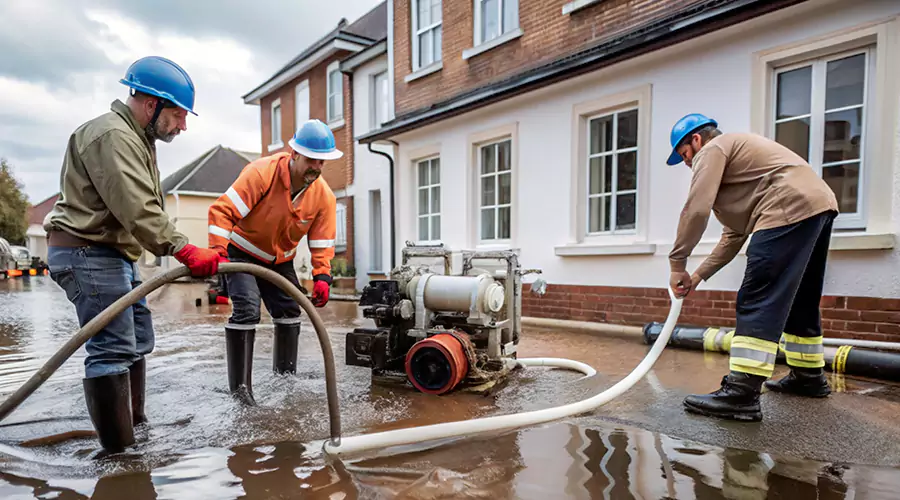

Water damage is one of the most urgent issues a property owner can face. Whether caused by a burst pipe, appliance failure, roof leak, or flooding, the actions you take in the first 24 hours can dramatically reduce long‑term damage, prevent costly repairs, and protect your home or business from mold and structural problems. In this guide, you’ll find a practical, step‑by‑step plan for what to do immediately after discovering water damage.
Water spreads fast. Within just a few hours, moisture can soak deep into walls, floors, and ceilings. If left unaddressed, this moisture becomes a breeding ground for mold — which can begin growing within 24–48 hours — and can weaken structural materials. Taking quick, wise action helps limit these risks and sets the stage for a successful restoration process.
Safety should always be your top priority. Before doing anything else:
If water has reached outlets, appliances, or electrical panels, turn off the power to avoid electrocution. Only do this if you can do so safely; otherwise, wait for professionals.
Floodwater or sewage backups may contain harmful bacteria or chemicals. Stay out of affected areas unless you’re wearing protective gear like gloves and waterproof boots.
Sagging ceilings, warped floors, or cracked walls can signal structural instability. If you spot these, evacuate immediately and call professionals before re‑entering.
Once it’s safe:
Stopping the source quickly reduces ongoing damage and prevents more water from saturating your property.
Documentation is essential for insurance claims and restoration planning.
Take Photos and Videos of:
Create a Damage Inventory
Note the damaged items, their condition, and estimated value. Save any receipts if available — this can help with reimbursement.
Notify your insurer as soon as possible. Early communication helps:
Most policies allow emergency mitigation — such as water removal and temporary repairs — even before an official inspection.
If the water level is shallow and it’s safe to do so, begin removing water:
Removing standing water quickly reduces how much moisture seeps into walls and floors.
Some items can be saved if moved promptly:
This helps protect items from further damage and gives you time to decide what can be restored.
Drying helps prevent mold and musty odors. Here’s what to do:
This is a temporary solution until professional equipment can be installed, but it helps reduce moisture quickly.
DIY drying is often not enough — hidden moisture inside walls and floors needs specialized tools.
They can move air but don’t remove moisture effectively like commercial dehumidifiers.
Even items that seem unsalvageable may need to be documented by your adjuster.
Within the first 24 hours, it’s ideal to have a certified water damage restoration company begin mitigation. Professionals will:
This ensures a thorough restoration — not just visible cleanup.
The first 24 hours after water damage are critical. Acting quickly and smartly can stop damage from spreading, lower restoration costs, protect your belongings, and reduce health risks. From ensuring safety and stopping the water source to documenting damage, contacting insurance, and calling restoration professionals, each step you take sets the foundation for successful recovery.
Our certified experts are ready 24/7 to assist you with emergency restoration services.
GET A QUOTE